Posts

Showing posts from February, 2018

Lab 4: Introduction to Pix4D

Image
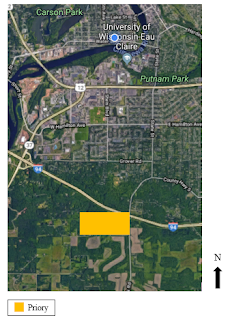
Introduction to Pix4D Introduction             A premium software for analyzing unmanned aerial system (UAS) data is Pix4D. Pix4D creates images by using thousands of common points between images. This software uses matching keypoints to create 3D points. Matching keypoints are two points located on different images that are the same. In this introduction lab, the UAS data was already proceeded by Dr. Joseph Hupy. The data structure of processed UAS data in Pix4D is exported in the same structure. Four folders and a text document will be created (Figure 1). The files will be 1_initial, 2_densification, 3_dsm_ortho, and temp. These files contained all of the outputs needed to complete the following introduction lab.                In this lab, the UAS dataset was of a mine site in Eau Claire, Wisconsin. The main task of Pix4D was to assess the stockpiles present on site. A very important aspect used in this dataset was the volume calculator. The animation tool was also able to b

Lab 3: Development of a Field Navigation Map

Image
Development of a Field Navigation Map Introduction             This lab consists of the creation of maps to use in the future for field navigation. The maps created needed to have appropriate contours, coordinate systems, and labels in order for the student to be successful in the field with the use of this map. The first map was created with a UTM grid with 50 meter spacing as the coordinate system. The second map was created using decimal degrees with two degree spacing. The data to complete this lab was provided by Professor Hupy.             When using data from multiple sources one needs to make sure that the projections of those datasets are the same. A project is simply transferring spatial data from one coordinate system to another. The use of the project tool can be used to switch to the desired projection system. For example, if the current projection was latitude and longitude, but NAD 83 UTM Zone 15N was desired, the project tool could switch the projection of that

Lab 2: Visualizing and Understanding the Sandbox Terrain Survey using ArcGIS

Image
Visualizing and Understanding the Sandbox Terrain Survey using ArcGIS Introduction             On Saturday, February 3 rd , a survey of a sandbox terrain was taken in the chilly February snow. The sandbox was a 114 cm x 114 cm square located to the east of Phillips Hall on the University of Wisconsin – Eau Claire campus. The survey group created a terrain involving a ridge in the northern section of the sandbox with two hills in the southern portion. A grid was set up containing 6 cm x 6 cm squares that were used to perform a normal survey method. This lab utilizes ArcGIS software to create a visualize of the sandbox surveyed that day.             Before analyzing this data, the excel file needed to be normalized. Data normalization is simply the organization of data so that it can be easily analyzed. According to Whatis.com, “Database normalization is the process of organizing data into tables in such a way that the results of using the database are always unambiguous and as i

Lab 1: Creation of a Digital Elevation Surface using Critical Thinking Skills and Improvised Survey Techniques

Image
Lab 1: Creation of a Digital Elevation Surface using Critical Thinking Skills and Improvised Survey Techniques Introduction             The process of sampling is a simplification process that allows one to describe a whole population or area. One takes a sample of data from just a portion of the population or area and then applies those data points to the whole population or area. Major Sampling Techniques: •                   Random: This method takes data in a random fashion with no designated order. This technique works well within the surveying of a human population. •                    Regular: This technique provides a designated order for collecting data points. Regular sampling technique works well within a survey of a geographic area.                  The objective of this lab was to help students utilize their critical thinking skills to develop an efficient way to survey an area. The survey area was a sandbox with the dimensions 114 cm x 114 cm. St